Installation
Make sure you read the entire bullet point before you start doing what the bullet point says.
Step 1: Creating a github account
Watch this video to get an idea of what you are about to do. But do not follow this is just for informations: https://www.youtube.com/watch?v=Gn3w1UvTx0A
- Make a github account and remember or copy what your username and email you used to sign up with is https://github.com/
- Creating a repo: watch this video up until min 1:21 just for information do not follow it https://www.youtube.com/watch?v=f26KI43FK58
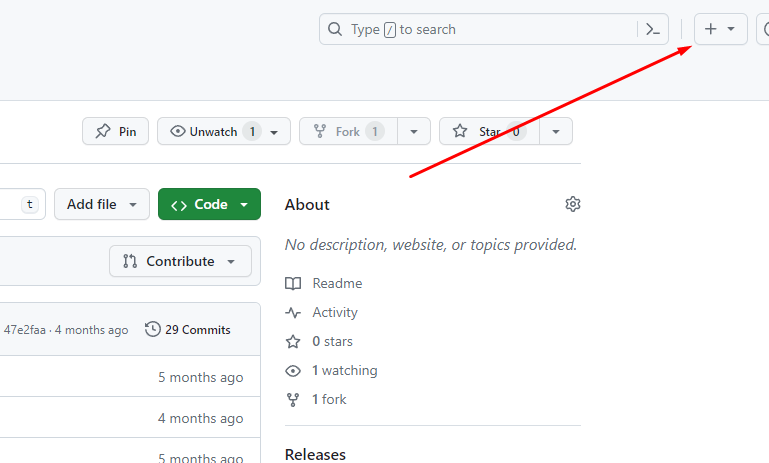
- click the plus icon like in the video and click new repository
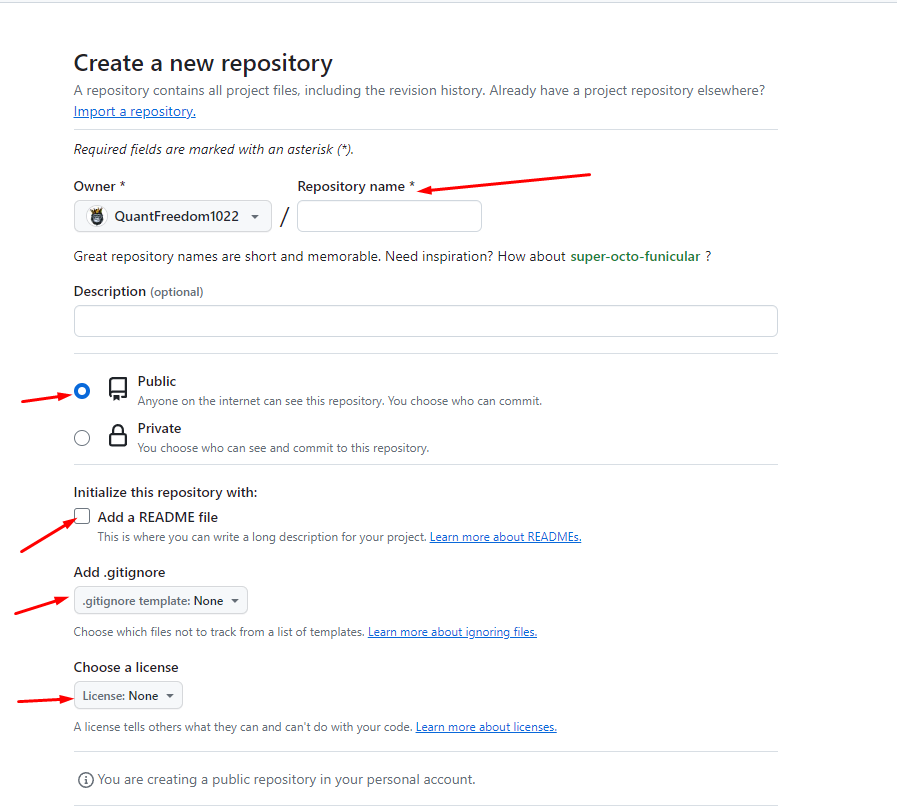
- give your repo a name
- make sure it is public
- add a readme file
- add a python gitignore by click on the add gitignore dropdown and type python and select it
- click on the choose license and choose the Apache license 2.0
- click create repository
Step 2: Installing Python
- Helper video: example video of someone installing python ... but do not follow along with what he is doing, just watch this to get an idea of what you will be doing https://www.youtube.com/watch?v=m9I-YpOjXVQ
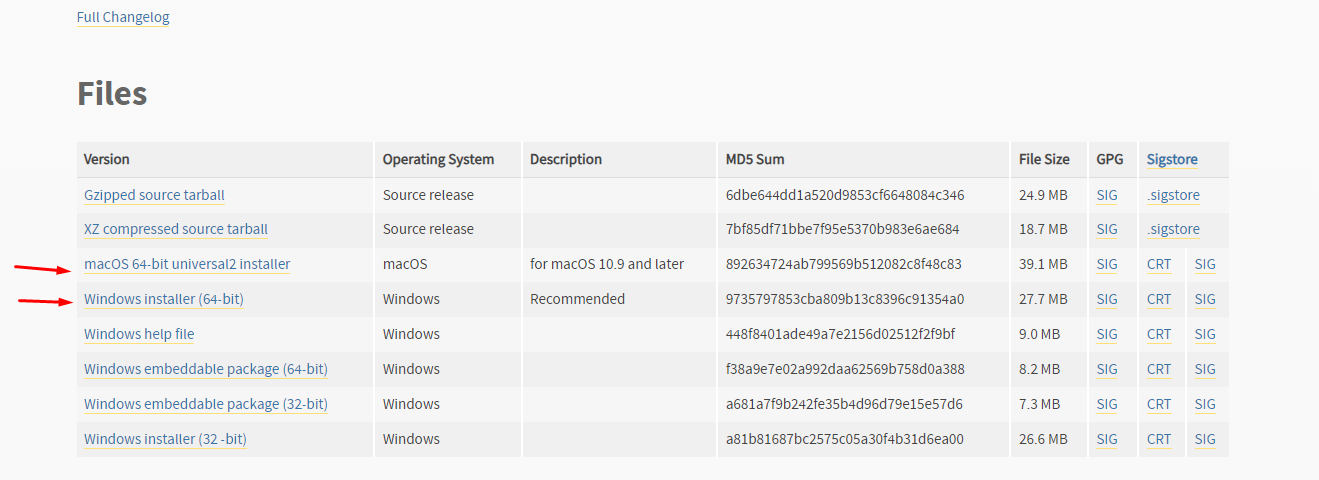
- Download python 3.10.10 - If you already have another version of python installed that is fine because you can have multiple versions of python installed - https://www.python.org/downloads/release/python-31010/
- To download Scroll down to the bottom of the page or where it says files and click on either the mac version or windows version and install it
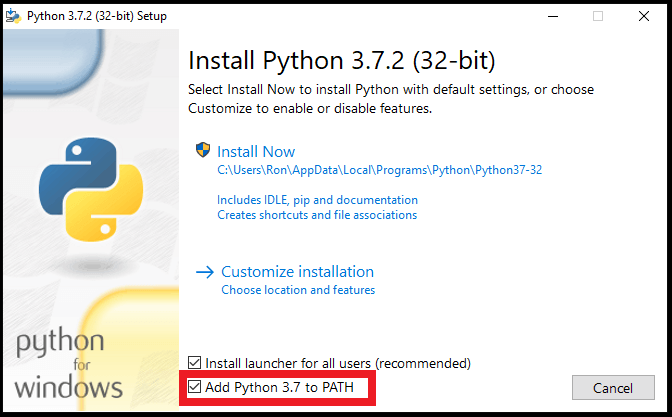
- when you start the install make sure you click add python.exe to path at the bottom of the installer window. Ignore the 3.7.2 this is just an image to show you where to check add to path.
- click on customize install
- click next
- check install python 3.10 for all users
- click on install
Step 3: Installing Git Bash
Git Bash is how you allow your computer to talk to github.
- Please watch this helper video first before doing anything … but it important to note Helper video: https://www.youtube.com/watch?v=2j7fD92g-gE
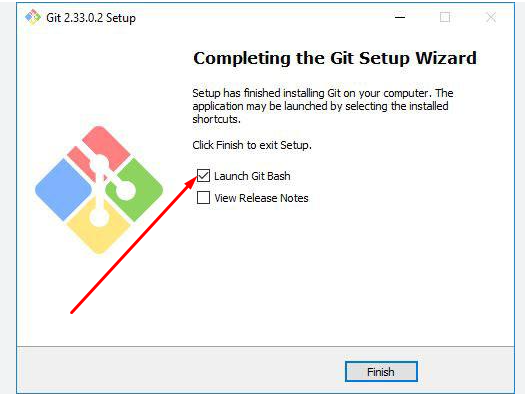
- Download git and at the end of install make sure you check Launch git bash
- https://git-scm.com/downloads
- Copy paste the the following in the window and replace @@@@@@@@ with your github username and make sure it has quotes around your username. For me copying it from here and right clicking in the gitbash window is how i actually past it.
- git config --global user.name "@@@@@@@@"
- Now type the following and change the email to the email you used to sign up with github
- git config --global user.email johndoe@example.com
- git config --global init.defaultBranch main
Step 4: Download Visual Studio Code
This is the program I use to code
- Watch this helper video first so you have an idea of what you are about to do: https://www.youtube.com/watch?v=JPZsB_6yHVo
- Click this link and download for your operating system, then lanuch VSC https://code.visualstudio.com/download
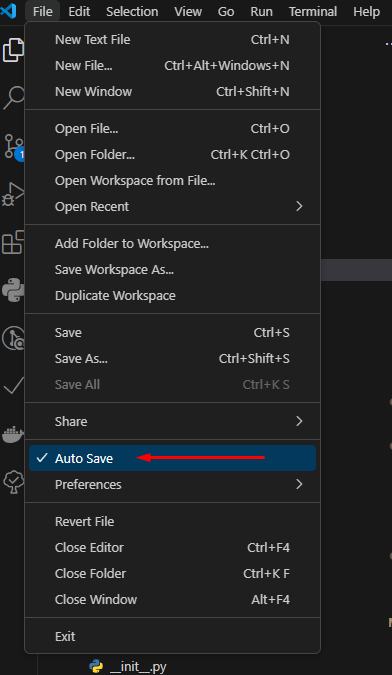
- In the top left corner, in the menu bar click file, then make sure autosave is checked, if it isn't click it to set it
Installing Extensions
-
Click the extensions tab which is the 5th icon from the top that looks like 3 squares with the upper right square coming off a little bit.

-
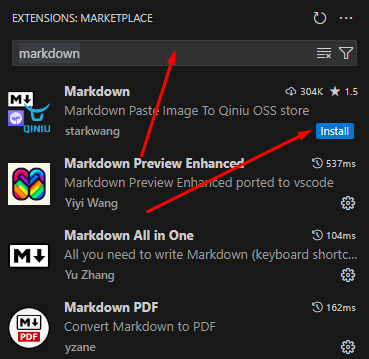
Install the following extensions Type in the following extensions one by in the search bar … if you already have it installed then move to the next on the list
-
Python - python
- Black formatter - this will allow you to format your code
- Gitlens - this is to help with github stuff
- jupyter - lets you run jupyter notebooks
- Magic python - helps with formatting
- Material icon theme - makes your icons nice
- Prettier - helps with formatting
- Pylance - python stuff
- Python indent - indents your python code properly
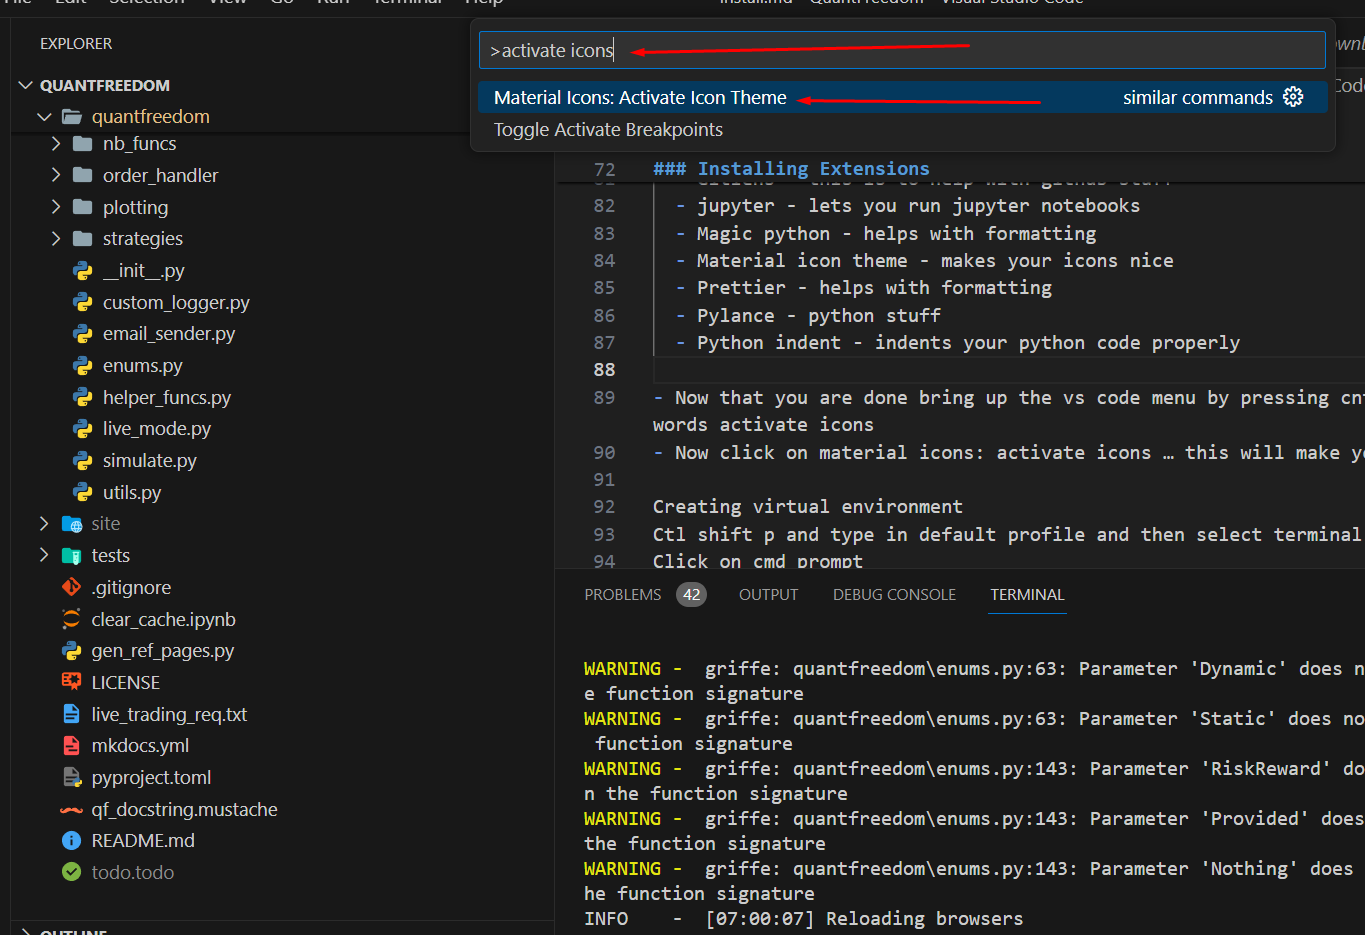
- Now that you are done bring up the vs code menu by pressing cntrl shift p and type in the words activate icons
- Now click on material icons: activate icons … this will make your file icons look a lot better
Creating virtual environment
This part isn't done yet but you will need to make your default profile the cmd or zrh ... then create a virtual env ... then select that env as your default interpreter
- Ctl shift p and type in default profile and then select "Terminal: Select default profile"

- Click on cmd prompt for windows and zsh for mac

- In the menu bar click on terminal then click new terminal

- Create a folder called coding wherever you want on your computer. I suggest anywhere that isn't your desktop. The best would be another hard drive that isn't your main hard drive
Not finished yet
create venv
- create a folder somehwere on your computer
- create a file inside that folder called my_keys.py
- Create venv
- python -m venv qfree
- now cd into qfree
- in the command line type echo (this should be the path to your folder) > my_keys.pth
- example
- echo E:\Coding\my_keys > my_keys.pth
- Scripts\activate - this will activate the virtual enviromnelt
- Now you will see we have free to the left of the thing
- Ctrlp shift p type in word interpreter
- Select python interpreter
- Then enter interpreter path
- Then find
- Then go to the coding folder then venvs then qfree then scripts then click on python.exe
- for mac you have to get the folder path to the python file and copy paste the whole path into the find section
- Vscode file autosave
- Vscode search clone git repo then paste … select folder
- Now create new file called test.ipynb
- Select kernel python en
- Add this to settings.json
- "editor.parameterHints.enabled": false,
- "python.terminal.activateEnvironment": true,
- "jupyter.debugJustMyCode": false,
- "debug.allowBreakpointsEverywhere": true,
- "debugpy.debugJustMyCode": false
- Create github
- Create repo
- Then download python
- Download vs code
- Then clone repo
- Then create venv
- Pip install quantfreedom
- Then select inpertere
- Then menu terminal new terminal